Self-Saucing Chocolate Puddings with Earl Grey Ice Cream and Almond Tuile

Self-Saucing Chocolate Pudding with Earl Grey Ice Cream and Almond Tuile

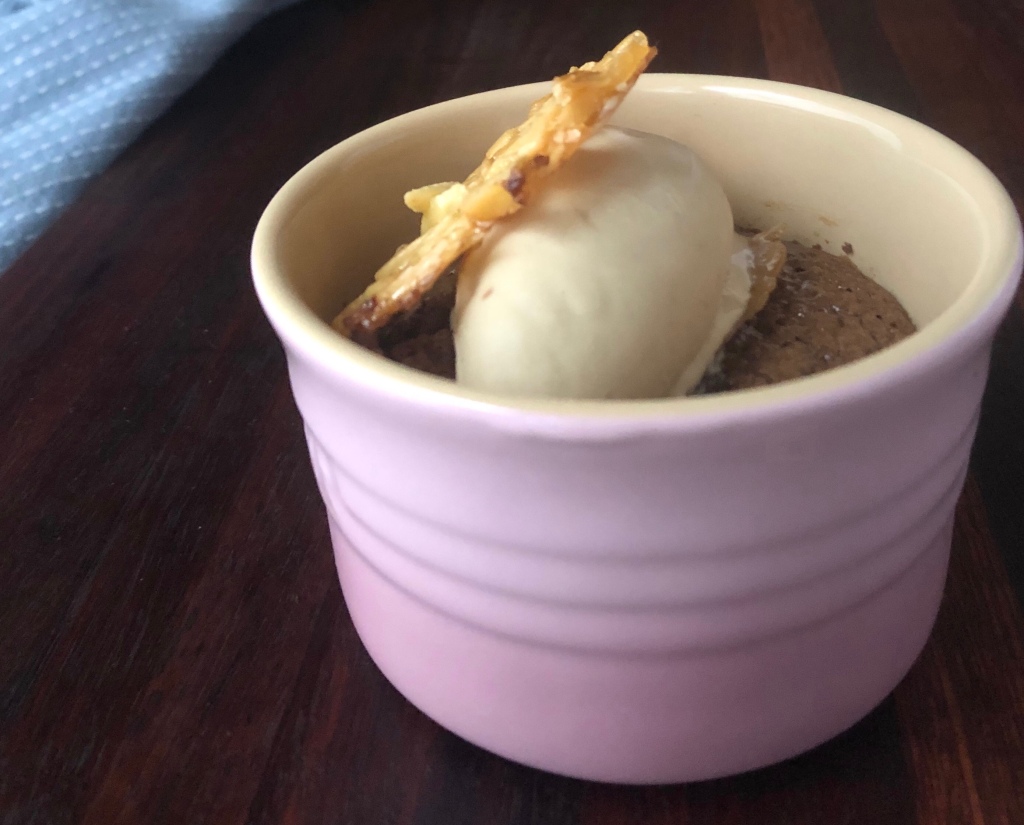
A while ago we made a batch of Earl Grey Ice Cream, which was so delicious and had the smoothest, creamiest consistency. It just seemed like it needed a few more elements to make it a special dessert worth serving at a dinner party. It’s winter here in Sydney so there’s nothing better than a nice warm little ramekin filled with a gooey chocolate pudding. Topped with the ice cream and then a crunchy little shard of almond tuile, this dish was the perfect end to our recent dinner party.

Best of all, everything can be made in advance, leaving you more time to chat with your guests and enjoy a glass of wine! We made the ice cream a few days ahead and stored it in the freezer. The puddings were prepared in the morning and stored in their ramekins in the fridge until ready to bake. The tuiles can be made a few hours ahead, left to cool and then stored in an airtight container until ready to serve. You’ve got to love a delicious dessert as easy to assemble as this!

Of course, if you’re looking for a comforting pudding without all the bother, you can just make the pudding by itself and add a scoop of store-bought ice cream. Or try toasting a few slivered or flaked almonds to scatter over the pudding.

This recipe serves 6 people, although you will have a lot of leftover ice cream and about twice the amount of tuiles as needed (which can be handy if you need a few tries to get your tuiles perfect like we did!)

Earl Grey Ice Cream

  • 400ml full-cream milk
  • 5 Earl Grey teabags
  • 160g caster sugar
  • 5 egg yolks
  • 450ml thickened cream
  1. Place the milk and teabags in a heavy-based saucepan and bring to a simmer over a medium heat. Reduce the heat to low and leave to infuse for 10-15 minutes, stirring occasionally, until the milk has become a deep brown colour and tastes strongly of tea.
  2. Remove the tea bags and bring the milk back up to a simmer. Add the sugar and stir until dissolved.
  3. Place the egg yolks in a large mixing bowl and lightly whisk. Gradually pour the hot milk mixture into the bowl, whisking continuously so the eggs don’t curdle.
  4. Pour the mixture back into the saucepan and keep stirring over a low heat until thickened enough to coat the back of a spatula.
  5. Set aside to cool for about 10 minutes, then add the cream and stir well. Refrigerate the mixture for at least two hours, or overnight.
  6. Churn the mixture in an ice-cream maker according to the manufacturer’s instructions. You can serve the ice cream immediately from the ice cream maker, although it will have a soft-serve consistency. Or you can place it in an ice cream container and freeze until ready to serve. Just be sure to remove the ice cream from the freezer 10 minutes before you want to serve it.

Chocolate Puddings

  • 100g dark chocolate, chopped
  • 125g butter
  • 2 eggs
  • 2 egg yolks
  • 50g caster sugar
  • 50g ground almonds
  • 1 tsp sea salt flakes
  • butter or vegetable oil for greasing
  1. Grease 6 ramekins or oven proof dishes and set aside. Preheat oven to 170°C.
  2. Place the chocolate and butter in a bowl and set over a saucepan half filled with simmering water, making sure the water doesn’t touch the bowl. Allow the chocolate and butter to melt and stir together.
  3. Whisk the eggs, egg yolks and sugar together for 4 minutes, until pale and thick. Fold in the chocolate mixture, ground almonds and sea salt.
  4. Spoon the mixture into the prepared ramekins and set aside or refrigerate until ready to cook.
  5. When you are ready to serve, bake the puddings for 12-14 minutes, until raised a little but still soft in the middle.

Almond Tuiles

  • 30g water
  • 30g honey
  • 110g butter
  • 115g icing sugar
  • 25g plain flour
  • 60g slivered almonds, toasted
  1. Preheat oven to 160°C.
  2. Heat honey and water in a small pot over a medium heat until the honey has melted.
  3. Sift the icing sugar and flour into the liquid mixture and stir well to incorporate.
  4. Add the slivered almonds and stir well.
  5. Place the tuile mixture in the fridge to cool for about 20 minutes.
  6. Line a baking tray with baking paper.
  7. Using a teaspoon measure, take out one teaspoon of the mixture at a time and roll in your hands to create a small ball.
  8. Place 6 – 8 balls of mixture on the baking tray, leaving room for them to spread as they cook.
  9. Bake in the oven for 10 minutes or until a deep amber colour.
  10. Remove from the oven and allow to cool.
  11. If you’ve managed to create perfect tuile circles, well done! If not, use a cookie cutter to cut out 5cm circles. Or you can snap the tuile into shards instead.
  12. Allow the tuiles to cool completely before serving. If not serving immediately, place in an airtight container until ready to serve.

To Serve:

  • Self-Saucing Chocolate puddings
  • Earl Grey Ice Cream
  • Almond Tuiles
  • 1 lemon
  1. While baking your puddings as described above, use a spoon dipped in warm water to make six quenelles of ice cream, or you could use an ice cream scoop instead.
  2. Once the puddings are ready, use a microplane to grate a pinch of lemon zest over the pudding.
  3. Top with a quenelle/scoop of ice cream.
  4. Add the Almond Tuile and serve immediately.
Mapo Tofu

Mapo Tofu
Mapo Tofu

Our new is favourite cookbook is “Hong Kong Food City” by Tony Tan. We purchased it on a whim from a bookstore while on holiday in the beautiful little town of Kiama, about 2 hours south of Sydney. If there’s anything better than finding a gem of a book while on holiday, it’s making delicious food that demands to be made again and again. So far we’ve made 4 dishes from this book and would make any of them again. But first there are many more recipes we want to try.

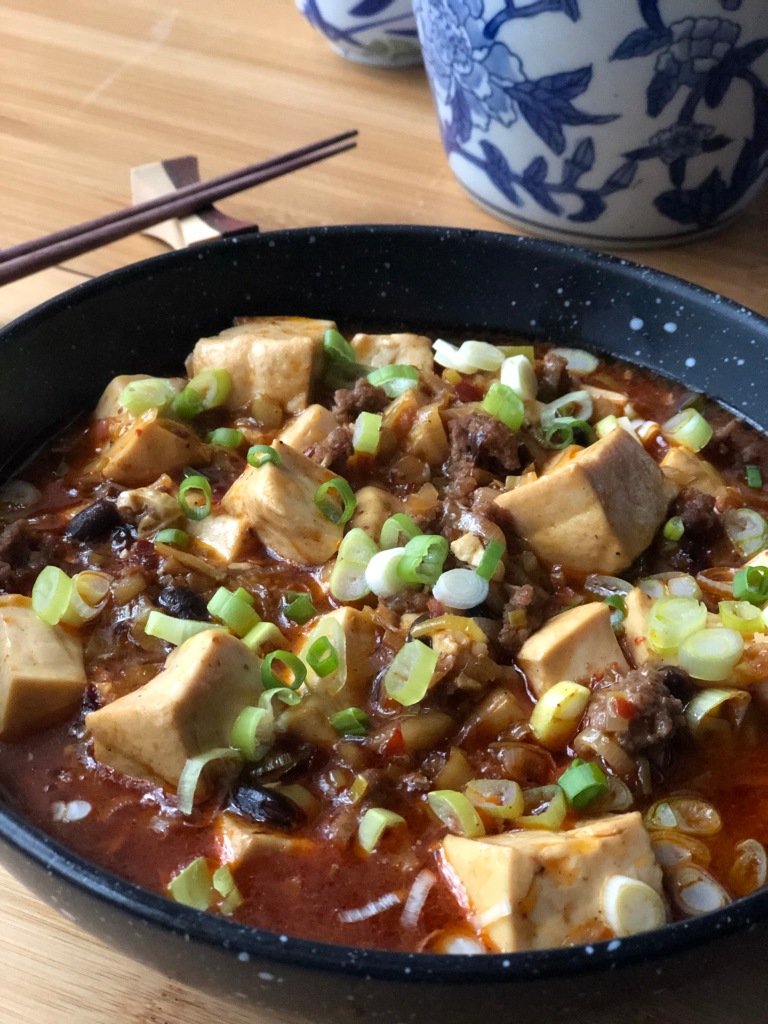
Today we’re bringing you the best dish from the book so far, Mapo Tofu. This has long been one of our favourite dishes to order when eating out, so being able to create a beautiful version at home is exciting and much simpler than we had thought. We love the silkiness of the tofu, the zing of the Sichuan pepper, and the depth of flavour in the sauce. It’s spicy, but not so hot that you you’ll be crying.

The traditional Mapo Tofu recipe uses beef mince, but if you want to make the dish vegetarian, you can substitute some finely diced mushrooms, and replace the chicken stock with vegetable stock. Both versions work really well.

A note on a few ingredients you may be unfamiliar with: Doubanjiang or Chilli bean paste from Sichuan can be hard to find, but the Lee Kum Kee brand works fine and is available in supermarkets. Fermented black beans can be found at Asian grocers. Sichuan preserved vegetable is made from the stems of mustard greens. We found it labelled as “preserved mustard greens” in our local supermarket.

This is a really simple dish to make, but we would recommend that you spend some time measuring out all your ingredients at the start. Once your wok is hot you’ll be adding all the ingredients very quickly and you don’t want to be measuring everything out at this point.

Serves 2 people as a main dish with some fluffy jasmine rice, or 4 people with the addition of another dish such as some simple stir fried green vegetables with oyster sauce.

Ingredients:

  • 50g minced beef (or finely diced mushrooms)
  • 500g soft bean curd (or tofu), cut into 3cm cubes
  • 3 Tbsp vegetable oil
  • 2 garlic cloves, finely chopped
  • 2 Tbsp Chilli bean paste(Doubanjiang)
  • 2 tsp fermented black beans
  • 2 tsp light soy sauce
  • 1 tsp sugar
  • 1 Tbsp chilli oil
  • 250ml chicken or vegetable stock
  • 1 baby leek, finely sliced
  • 1 tsp roasted ground Sichuan pepper
  • 1 tsp chilli flakes (optional)
  • 30g Sichuan preserved vegetable, rinsed and finely chopped
  • 1 tsp potato or corn flour, mixed with 2 Tbsp water
  • Spring onions, finely sliced, to serve

Marinade:

  • ½ tsp light soy sauce
  • ½ tsp Shaoxing rice wine
  • ½ tsp salt
  • ½ tsp sugar
  1. Place the beef or mushrooms in a bowl and add the marinade ingredients. Mix well and set aside.
  2. Bring a saucepan of water to a simmer. Gently place the bean curd in the pan and cook until warmed through. Remove with a slotted spoon and drain on a plate lined with paper towels.
  3. Heat a wok over high heat, add the oil and then the beef or mushrooms. Stir fry for 20 seconds, then add the garlic.
  4. Reduce the heat to medium and add the chilli bean paste, fermented black beans, soy sauce, sugar and chilli oil. Stir fry for another 30 seconds.
  5. Pour in the stock, add the bean curd and stir gently so as not to break the bean curd cubes. Bring to the boil, then reduce heat and simmer for 2 minutes.
  6. Add the leek, Sichuan pepper, chilli flakes (if using), Sichuan preserved vegetable and potato flour mixture. Stir and simmer until the sauce thickens.
  7. Transfer to a serving dish and garnish with spring onions. Serve with steamed rice.

Apple and olive oil cake with maple icing

Apple and olive oil cake with maple icing

Recently we made a birthday cake for our dear friend Alex, who loves anything with apples and sultanas. A little flick through one of our favourite cookbooks, Sweet by Yotam Ottolenghi and Helen Goh, provided us with this wonderful recipe. It nailed the brief (Alex loved it) but to be honest the real star of this cake is that maple icing. It’s dangerously good. Don’t make extra or you will end up smothering it on everything from crumpets to cupcakes. Best of all, it’s a quite simple cake to make. If you’re not a regular baker, this is a good recipe to try something new!

Apple and Olive Oil Cake

  • 100g sultanas
  • 275ml water
  • 350g plain flour
  • ½ tsp ground cinnamon
  • 1 ½ tsp bicarbonate of soda
  • 1 ½ tsp baking powder
  • ½ tsp salt
  • 800g Granny Smith apples
  • 200g caster sugar
  • 150ml olive oil
  • 2 large eggs, lightly beaten
  • 2 egg whites
  • scraped seeds of ½ vanilla pod
  • finely grated zest of 1 lemon

Maple Icing

  • 100g unsalted butter, at room temperature, plus extra for greasing
  • 100g soft light brown sugar
  • 85g maple syrup
  • 220g cream cheese
  1. Preheat the oven to 180°C
  2. Grease a 23cm round cake tin and line the base and sides with baking paper, ensuring the paper rises a few centimeters above the sides of the tin.
  3. Add the sultanas and 200ml of water to a small saucepan. Bring to a simmer and reduce the heat to low. Set aside once all the water has been absorbed.
  4. Sift the flour, cinnamon, bicarbonate of soda, baking powder and salt together into a large bowl.
  5. Peel and core the apples, then dice the fruit into 2-3cm chunks and set aside in a separate bowl.
  6. Place the sugar, olive oil, whole eggs, vanilla seeds and lemon zest in a bowl and beat with an electric mixer on a medium speed for 6-7 minutes, or until the mixture is pale and thick and has doubled in size.
  7. Use a spatula to fold in the diced apple, sultanas and the remaining 75ml of water. Add the sifted dry ingredients and fold in as well.
  8. Place the egg whites in a clean bowl and whisk until soft peaks form. Gently but thoroughly fold the egg whites through the cake mix, then scrape the batter into the tin. Level the top of the mixture with a spatula and bake for 60 minutes, or until a skewer inserted into the middle of the cake comes out clean. Set aside to cool in the tin.
  9. For the icing, place the butter, sugar and maple syrup in a bowl and beat with an electric mixer until pale and airy. Add the cream cheese a little at a time and continue to beat until smooth and thick.
  10. When the cake has completely cooled, use a large serrated knife to slice in half horizontally. Spread half the icing over the bottom layer of the cake and place the other layer on top. Spread the remaining icing over the top of the cake and using a spoon or palette knife, lightly flick the icing to create little icing spikes (or you could just leave it flat and smooth if you prefer). Leave the sides of the cake bare so the icing in the center can be seen.

Lamb Harira

Lamb Harira
Lamb Harira

Today we’re bringing you one of our all time favourite recipes! This is our version of the Moroccan dish Harira, a soup or stew usually served at special occasions. The great thing about this stew is that it’s easy to make, extremely delicious and you feel virtuous eating it, as it’s packed full of vegetables and herbs. There are many versions of this recipe, and so many options for which ingredients you could include. We’ve used lamb shanks as they are easy to source and add a nice depth of flavour to the stew, but you could use any kind of meat which benefits from a few hours of slow cooking. Similarly, we used freekeh as our grain because that’s what we had in the cupboard, but buckwheat, lentils or chickpeas would all work just as well. We’ve used winter vegetables which are in season, but use whatever you have available or the vegetables you like most.

We love making this in the morning and leaving the pot to simmer away all day, giving the flavour time to develop and filling our home with the fragrant aroma. The dish tastes even better the next day, so make more than you need and you’ll be rewarded with delicious leftovers for the rest of the week.

Ingredients:

  • 1 cup freekeh
  • 1 Tablespoon coconut oil
  • 4 lamb shanks
  • salt and pepper
  • 1 onion, diced
  • 2 celery stalks, diced
  • 6 garlic cloves, chopped
  • 1 teaspoon ground cumin
  • 1 teaspoon ground cinnamon
  • 1 teaspoon ground turmeric
  • ½ teaspoon ground ginger
  • ¼ teaspoon ground nutmeg
  • 400g can diced tomatoes
  • 2 litres stock or water
  • 1 sweet potato, diced
  • ½ butternut pumpkin, diced
  • 2 zucchini, diced
  • 1 bunch of kale
  • 1 handful of coriander leaves, chopped
  • 1 handful of parsley leave, chopped
  • 1 handful of mint leaves, chopped
  1. Soak the freekeh or buckwheat overnight, or cook according to the directions on the packet.
  2. Place a large pot over medium high heat and melt the coconut oil. Season the lamb shanks with salt and pepper then brown them on all sides. Remove the shanks and set aside.
  3. Add the onion and celery to the pot and fry for a few minutes, until the onion is translucent.
  4. Add the garlic and spices, and continue to cook for a minute or two, until fragrant.
  5. Add the chopped tomatoes and stock, give it a good stir, and then return the shanks to the pot.
  6. Bring the liquid to the boil, then reduce the heat and leave to simmer gently for at least two hours, or until the lamb is falling from the bone.
  7. Once the lamb is cooked, remove from the soup. When the shanks are cool enough to handle, remove the meat from the bones and roughly shred. Return the meat to the soup and discard the bones.
  8. Add the freekeh and sweet potato to the soup and simmer for 10 minutes, then add the pumpkin and simmer for a further 10 minutes. Finally, add the zucchini and kale and simmer for 10 more minutes.
  9. Adjust the seasoning and add the coriander, parsley and mint.
  10. Serve in a warm bowl with a slice of lemon, and some fresh crusty bread, if you like.

Korean Soybean Paste Stew with beef and mushrooms

Korean Soybean Paste Stew with beef and mushrooms

It’s winter here in Australia and we’re craving hearty, warming dishes like soups, stews and curries. We love eating out at Korean restaurants, and there are so many to choose from in Sydney now. We rarely cook Korean at home though, so we decided to try making this fairly simple stew. You need to visit a specialty Asian grocer to find a few ingredients, but they will last for ages and will hopefully inspire you to cook more Korean food in the future.

A few notes about this recipe – we added the beef stock to give the soup more body, a traditional recipe would just use the rice washed water, which we found a little bland. You can remove the chillies if you don’t like the dish very spicy. We used a mixture of enoki, shiitake and oyster mushrooms here but feel free to add whatever kind of mushrooms you enjoy.

Serves 2 people as a main dish, or can serve up to 4 people with the addition of Korean side dishes (Banchan).

Seasoning sauce:

  • 1 Tbsp light soy sauce
  • 2 tsp green onion, minced
  • 1 tsp garlic, minced
  • 2 tsp sesame oil
  • a pinch of salt and freshly ground black pepper

For the Stew:

  • 200g sirloin steak, thinly sliced
  • 2 cups medium grain rice
  • 500ml beef stock
  • 75g Korean soybean paste
  • 250g firm tofu
  • 100g mushrooms
  • 1 tsp Korean red pepper powder
  • 30g green onion, sliced
  • 1 green chilli, sliced
  • 1 red chilli, sliced
  • Sesame seeds, to garnish
  • Green onion, finely sliced, to garnish
  1. Prepare the seasoning sauce ingredients and mix together. Add the sliced beef and leave to marinate while you prepare the rest of the ingredients.
  2. Wash the rice in water and drain, reserving 500ml of the rice washed water. Put the rice on to cook in a rice cooker or according to the instructions on the packet.
  3. Drain the tofu and cut into 2cm cubes.
  4. Preheat a heavy pot or large saucepan over medium high heat. Add the beef and seasoning sauce and stir fry for two minutes.
  5. Add the beef stock and the rice washed water and bring the liquid to the boil. Reduce the heat to low, and keep the stew simmering gently.
  6. Place the soybean paste in a fine metal sieve and lower into the simmering stew. Allow the paste to dissolve into the stew for 10 minutes and then remove the sieve and any remaining solids.
  7. Add the tofu, mushrooms and red pepper powder and continue to simmer for another two minutes.
  8. Add the green onion and chillies and cook for another minute. Check the seasoning and adjust to taste.
  9. Serve the stew in bowls and garnish with sesame seeds and finely sliced green onion. Serve with a bowl of rice and side dishes of your choice, if you like.

Roasted eggplant with anchovy dressing and crispy oregano

Roasted eggplant with anchovy dressing and crispy oregano

Regular readers of our blog will have noticed we are fans of the prolific chef and author Yotam Ottolenghi. He has a genius for highlighting and complementing the flavours of his ingredients. His books have introduced us to many new ingredients over the years, most of which are now regular items in our pantry.

Like many people this year, we have spent a lot of time self-isolating at home, and one of the projects which kept us busy was cooking through Ottolenghi’s latest cookbook, Simple. As in all of his books, the recipes in Simple really bring so much flavour from a small amount of ingredients.

Ian’s favourite vegetable is eggplant but we know not everyone is a fan of its texture or flavour. Trust us though, if anyone knows how to make the eggplant shine, it’s Ottolenghi, and this is the dish to convince you eggplant-doubters to include this vegetable in your repertoire more often. Don’t be put off by the anchovies, it really just adds a depth of flavour and umami to the recipe rather than a fishy or overpowering taste.

We changed the recipe slightly by reverting to an older version of the recipe which uses crispy oregano. If you really can’t be bothered with this step, just use fresh oregano instead, although the crisp oregano does add an interesting texture to the dish.

This serves 4 people as a side dish, or 2 as a main. It goes well with just about any protein, but eggplant is always wonderful when paired with lamb. We hope you enjoy, let us know in the comments of you give it a try!

  • 4 medium eggplants
  • 100ml olive oil
  • 45ml vegetable or canola oil
  • 20g anchovy fillets in oil
  • 1 Tbsp white wine vinegar
  • 1 small garlic clove
  • 1 ½  Tbsp oregano leaves
  • 5g parsley leaves
  • salt and black pepper
  1. Preheat the oven to 240°C
  2. Line two large baking trays with baking paper.
  3. Slice the eggplant into 2cm thick discs and sprinkle with ½ tsp salt. Place the eggplant slices on the baking trays and brush both sides with 70ml of the oil. Bake for 35 minutes, or until the eggplant is a caramel brown colour and cooked through, but still holds its shape. Remove from the oven and leave on the baking tray to cool.
  4. For the crispy oregano, heat the vegetable or canola oil in a small saucepan over a high heat. Test if the oil is hot enough by dropping in an oregano leaf. The oregano should sizzle, become crisp and turn a brighter shade of green immediately. If the oil is too hot, the leaf will become dark in colour. Once your oil is at the right temperature, add one tablespoon of oregano leaves to the oil and cook for just a few seconds, until crisp. Remove from the oil with a slotted spoon and set aside on a plate lined with paper towel.
  5. To make the anchovy dressing, drain and finely chop the anchovy fillets and crush the garlic clove. In a bowl, whisk together the anchovy, garlic, white wine vinegar, ¼ teaspoon ground black pepper and a good big pinch of salt. Slowly add the remaining 30ml of olive oil, continuing to whish until the dressing is well combined.
  6. Finely chop the parsley and the remaining oregano, and place in a bowl with the eggplant. Pour over the anchovy dressing and gently toss to coat the eggplant. Place on a serving dish and scatter with the crispy oregano just before serving.

Banoffee Pie

IMG_3454

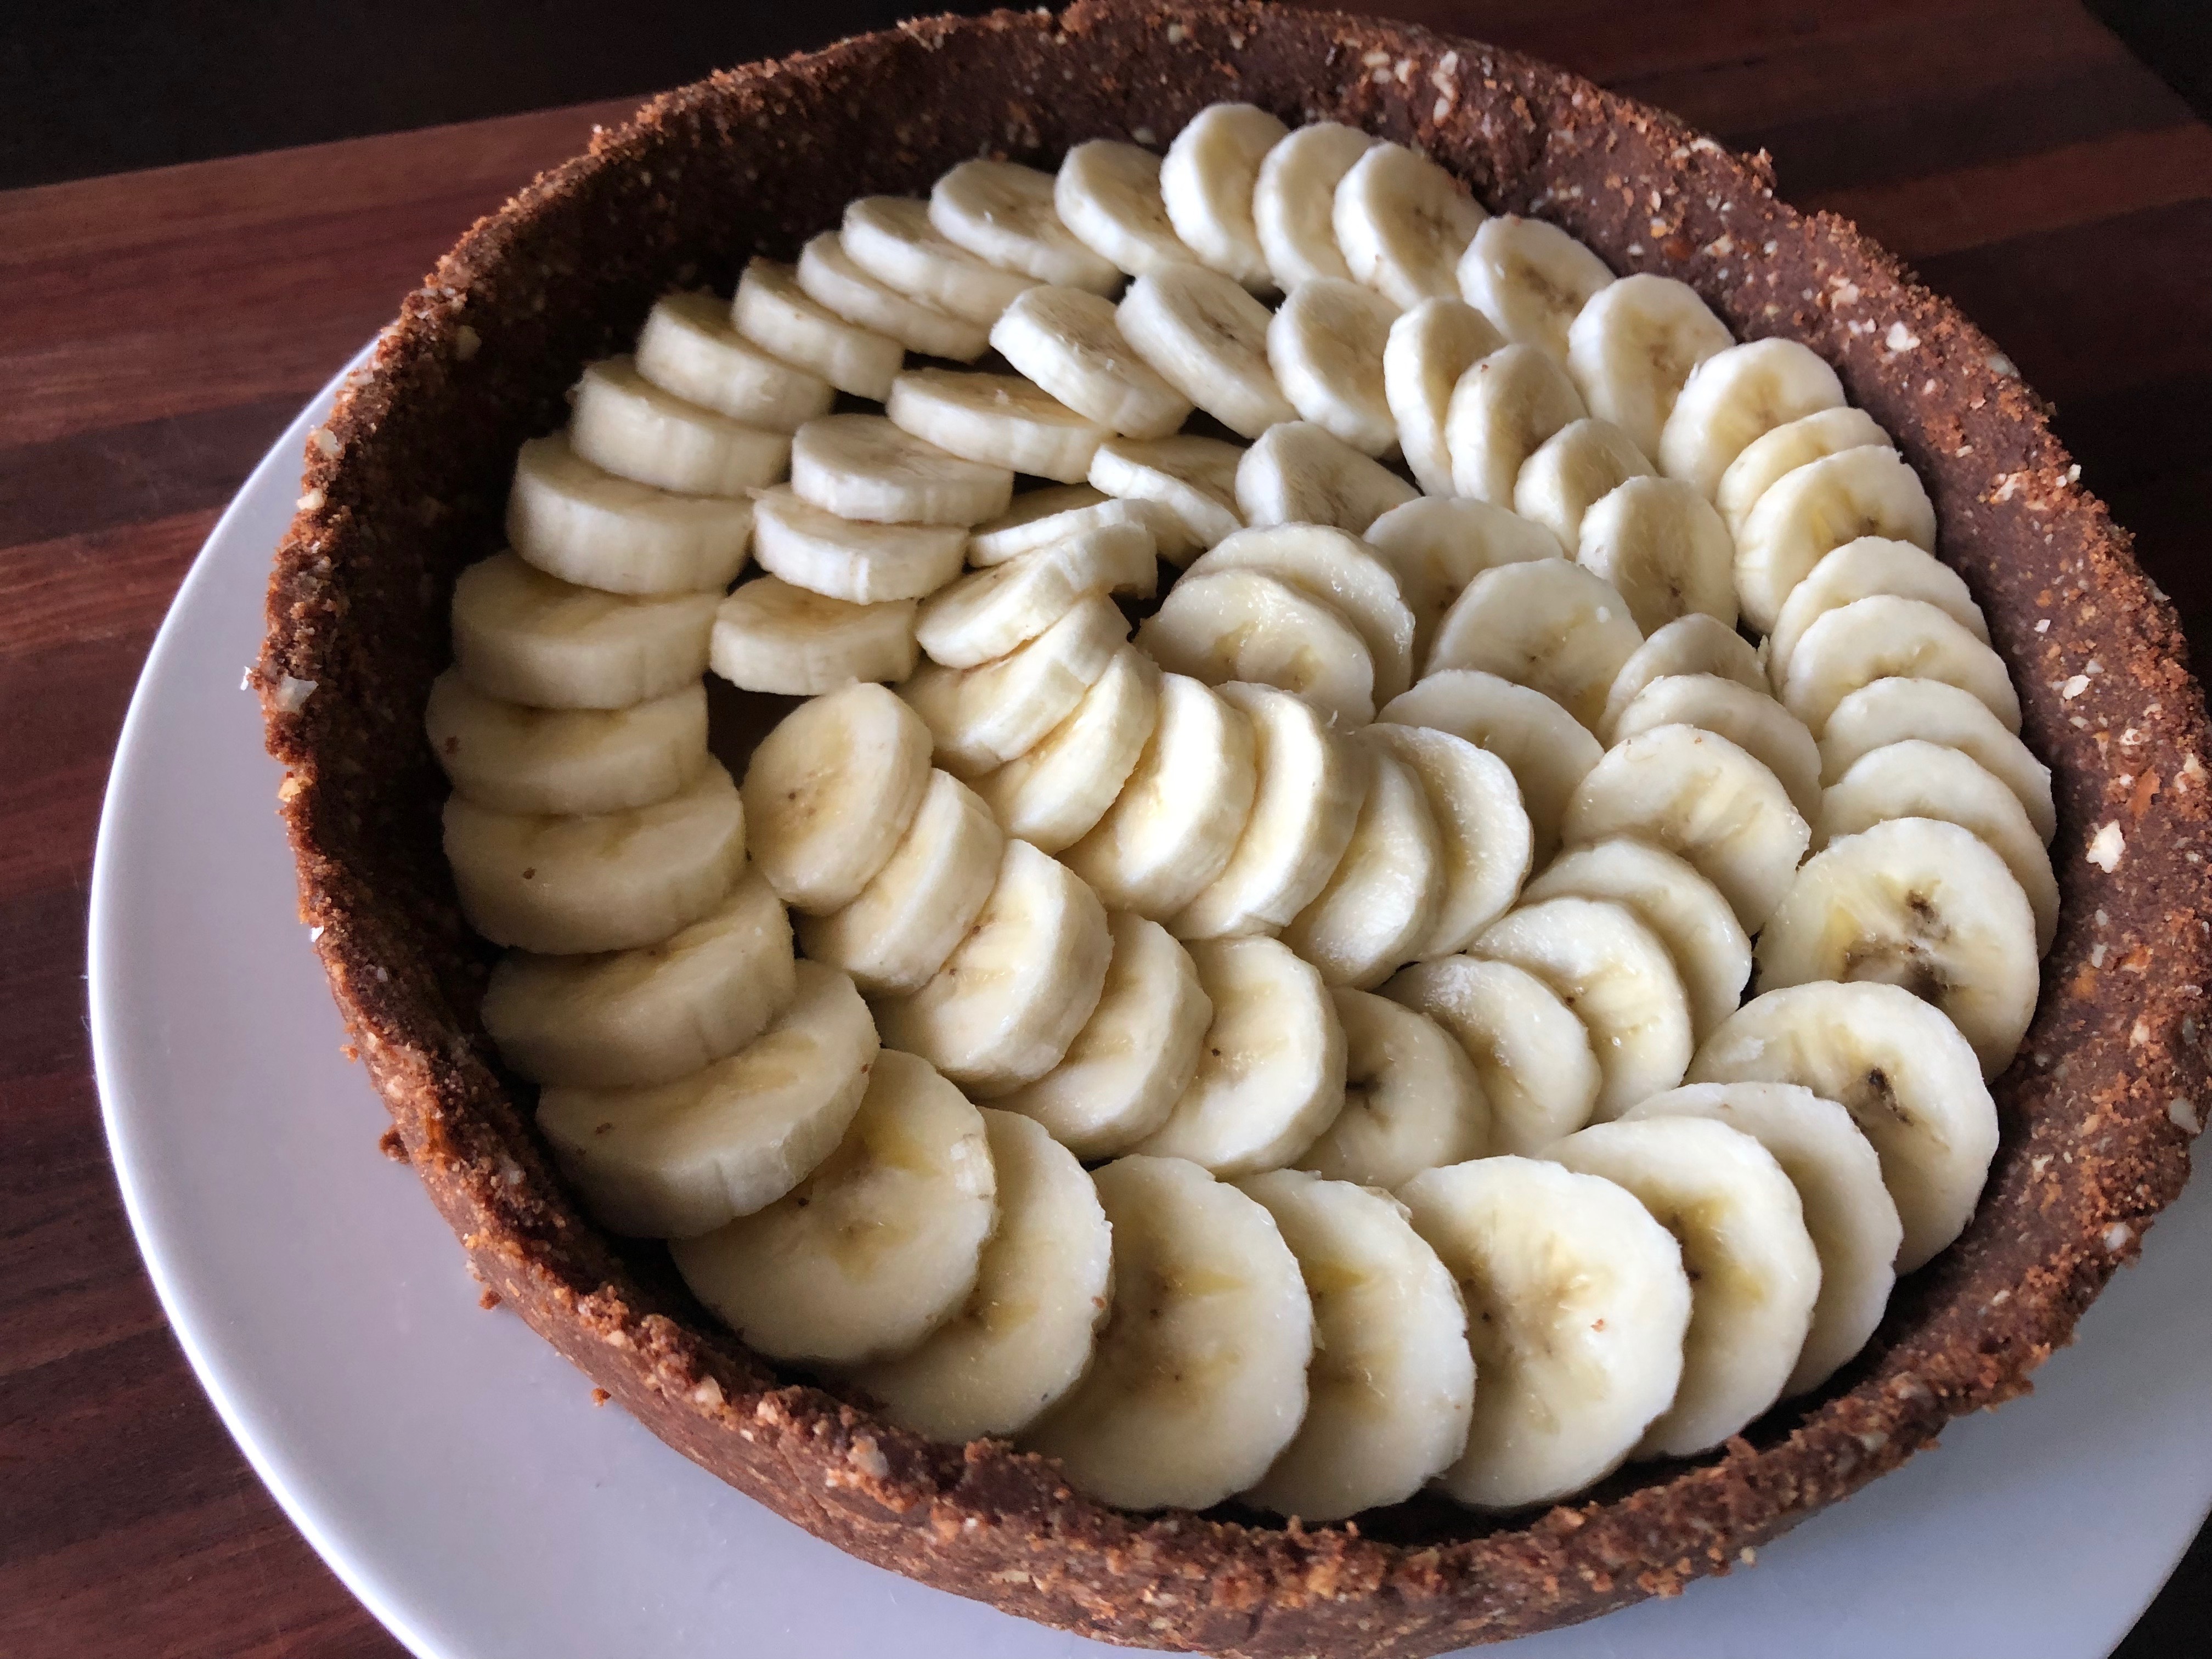
One rainy weekend, we noticed we had too many bananas and the thought of baking a batch of banana bread didn’t really appeal to our sense of adventure. A quick raid of the pantry later, we realised we had the ingredients for a Banoffee Pie and so we decide to try something new! There’s nothing like spending a rainy day in the kitchen and having a comforting treat as your reward. Banoffee Pie is a well-loved English dessert, and you’ll see why, with its crunchy biscuit base, luxurious caramel layer and the freshness of bananas and cream, it’s very hard to stop at one slice. Best of all, this is actually a really simple dessert to make, no baking required and very minimal effort to assemble!

Dulce de Leche Filling:

  • 1 can (395g) condensed milk

Place the can of condensed milk in a saucepan of water, ensuring it is fully submerged. Bring to the boil and cook for 3 hours, checking every 20 minutes to see if the water needs to be refilled, so the can stays completely submerged. Remove the can from the water and cool to room temperature before opening.

Crust:

  • 50g butter
  • 100g dark chocolate
  • 40ml Thickened Cream
  • 200g sweet biscuits (e.g. digestive biscuits)
  • 80g slivered almonds or blanched almonds
  1. Toast the almonds in a moderate oven until lightly browned. Once cool, roughly chop the almonds and set aside.
  2. In a food processor, grind the biscuits until they resemble breadcrumbs.
  3. Melt the chocolate, cream and butter in a bowl set over a saucepan of simmering water, or in the microwave.
  4. Add the melted chocolate mixture to the ground biscuits and almonds and mix well.
  5. Press the mixture into the base and sides of a 25cm tart mould, ensuring the mixture is evenly distributed. Refrigerate for at least 30 minutes to set the crust.

Chantilly Cream:

  • 250ml thickened cream
  • 2 Tablespoons icing sugar

Whip the cream and icing sugar together with an electric mixer until stiff peaks form.

To Assemble:

  • Crust
  • Dulce de Leche Filling
  • 2 large bananas, sliced into ¾ cm slices
  • Chantilly Cream
  1. Spread the Dulce de Leche filling across the base of the tart.IMG_0310
  2. Cover the caramel with sliced bananas.FullSizeRender
  3. Put the Chantilly cream in a piping bag, and cut the end of the bag into a 1.5cm opening. Cover the top of the pie with little dollops of cream, until completely covered.
  4. Garnish with edible flowers of your choice. Serve immediately or refrigerate until serving.

Chicken Teriyaki with Miso Roasted Eggplant, Spinach and Rice

chicken teriyaki, miso roasted eggplant, spinach and rice

chicken teriyaki, miso roasted eggplant, spinach and rice

This recipe brings together three of our favourite Japanese dishes into one little bowl of goodness. We serve this as an easy weeknight dinner and take leftovers to work the next day, or you could bulk the meal up with some edamame, sashimi or tempura to create a Japanese dinner party for friends.

We have adapted these recipes from Adam Liaw’s wonderful books The Zen Kitchen and Asian After Work. This recipe serves 4 people.

Teriyaki Sauce:

  • 125ml soy sauce
  • 100ml mirin
  • 100ml sake
  • 40g caster sugar

Mix together all ingredients in a saucepan and place over a low heat. Stir until the sugar has completely dissolved, then set aside until cool. You will have enough sauce for many meals, store in a bottle or jar in the cupboard until ready to use.

Miso Roasted Eggplant:

  • 2 large eggplants, cut into cubes
  • 2 Tbsp olive oil
  • sea salt

Miso Dressing:

  • 3 Tbsp miso paste
  • 1 Tbsp sugar
  • 2 Tbsp mirin
  • 1 Tbsp sake
  • 2 Tbsp water

Heat the oven to 220°C. Toss the eggplant with the olive oil and a pinch of salt and place on a baking tray lined with baking paper. Roast the eggplant for 20 minutes, or until the eggplant is beginning to brown. Mix together the miso dressing ingredients, and pour over the eggplant. Stir well to ensure the eggplant is evenly coated and then continue to bake for another 10-15 minutes, or until the dressing becomes less watery and the eggplant begins to caramelise. Remove from the oven and set aside.

miso roasted eggplant

miso roasted eggplant

Teriyaki Chicken:

  • 1 small brown onion
  • 6 chicken thigh fillets
  • 2 tsp cornflour
  • 2 tsp vegetable oil
  • ½ cup Teriyaki Sauce

Finely slice the onion and set aside. Slice the chicken thighs into small wedges and toss in the cornflour. Heat the oil in a non-stick frypan over high heat, then add the onion. Cook until the onion begins to brown, then add the chicken. Continue frying until the chicken is browned on all sides, but not cooked through. Add the Teriyaki Sauce and toss the chicken and onion to coat. Cook until the sauce reduces to a glaze and the chicken is cooked to your liking, then set aside.

chicken teriyaki

chicken teriyaki

Soy Spinach:

  • 1 bunch of spinach
  • 1 Tbsp soy sauce

Wash the spinach in cold water and leave to soak for around 10 minutes. Bring a large pan of water to the boil, then using chopsticks or tongs, hold the root and stems of the spinach in the water. After 10 seconds push the leaves of the spinach plant into the water as well. Cook for one minute then remove and drain in cold water. Once the spinach is cold, squeeze out as much of the water as possible, remove the roots and slice the spinach into 5cm lengths. Pour over the soy sauce and set aside.

To serve:

  • Medium grain white rice
  • Bonito flakes
  • 2 spring onions, thinly sliced
  • Toasted black and white sesame seeds

Add a little rice to each bowl, place some teriyaki chicken beside it, then some spinach, and finally some of the miso roasted eggplant. Sprinkle a pinch of the bonito flakes on the spinach, and scatter some sesame seeds and the spring onions across the chicken, eggplant and rice. Serve immediately and enjoy!

Opera Cake

Opera Cake

Opera Cake

One of Patrick’s favourite things to do in the kitchen is make buttercream and decorate cakes – he even has an entire instagram page devoted to his cake decorations (Check it out here: www.instagram.com/pattyjocakes). So when we decided to bake a cake for a friend, buttercream was at the forefront of our minds. This decadent cake consists of layers of sponge cake, buttercream and chocolate ganache, topped with a layer of chocolate glaze. We chose to serve our cake sliced, decorated with edible gold paint, but traditionally the cake would be served whole, with the word “Opera” piped on top in chocolate ganache. Either way, it’s a decadent hit of chocolate and coffee goodness best to share with friends so you aren’t tempted to go for a second slice!

Joconde Sponge Cake:

  • 85g   almond meal
  • 75g   icing sugar
  • 25g   plain flour
  • 120g eggs (around 2 medium eggs)
  • 80g   egg whites
  • 10g   caster sugar
  • 30g   butter, melted

Preheat oven to 200°C. Mix together the almonds, icing sugar and flour in a bowl. Add the eggs a little at a time and mix well until the batter becomes smooth and pale. In a separate bowl, whip the egg whites and sugar together until they form stiff peaks. Gently fold the batter into the whipped egg whites, then fold in the melted butter.

Spread the mixture on a baking sheet lined with baking paper to 5mm thickness, smoothing the mixture to ensure an even layer across the baking sheet. Bake for 15 minutes, or until the cake is golden and firm to the touch. Remove form the baking sheet and cool on a wire rack.

Coffee Buttercream:

  • 5g instant coffee
  • 15ml boiling water
  • 250g sugar
  • 60ml water
  • 90g egg yolks
  • 300g butter, softened
  • 4ml vanilla extract
  1. Dissolve the instant coffee in 15ml of boiling water and set aside to cool.
  2. Combine the sugar and 60ml water in a saucepan and place over a medium heat, stirring to dissolve the sugar. Continue to boil until the sugar syrup reaches 115°
  3. While the syrup is boiling, beat the egg yolks until they are thick and pale.
  4. As soon as the syrup reaches 115°C, pour it slowly into the egg yolks, continuing to whisk constantly.
  5. Continue to beat until the mixture has completely cooled. The yolks should be very thick and pale.
  6. Continue beating the mixture as you add the butter a little at a time.
  7. Beat in the vanilla and coffee mixture. If the buttercream is too soft to spread, refrigerate until it becomes firmer.

Dessert Syrup

  • ½ cup sugar
  • ½ cup water
  • 1 tsp instant coffee

Combine sugar and water in a saucepan and bring the boil, stirring until sugar dissolves. Add the coffee and stir well.

Chocolate Ganache

  • 200g dark chocolate, chopped
  • 250g double cream

Melt the chocolate in a bowl set over a hot water bath. Heat the cream and add to the chocolate. Mix well and chill.

Opera Glaze

  • 350g dark chocolate couverture
  • 60g peanut oil

Melt chocolate in a bowl set over a hot water bath. Stir in the oil. Allow to cool a little before using. (Makes a thin coating which sets solid but can easily be cut with a hot knife)

To assemble:

  • Joconde Sponge Cake
  • 50g dark chocolate, melted
  • Dessert Syrup
  • Coffee Buttercream
  • Chocolate Ganache
  • Opera Glaze
  1. Cut the sponge into 3 equal rectangular portions. Spread one piece with a think layer of dark chocolate, then refrigerate to set the chocolate
  2. Remove the chocolate coated sponge from the refrigerator, turn chocolate side down and brush with the Dessert Syrup.
  3. Spread a layer of Coffee Buttercream above the sponge rectangle, about 5mm thick.
  4. Place the second sponge rectangle on top. Brush with the syrup and then spread a thin layer of Chocolate Ganache on top.
  5. Top with the third and final layer of sponge. Brush with the syrup and spread with a layer of Coffee Buttercream, about 5mm thick. Smooth the top carefully with a palette knife.
  6. Refrigerate or freeze until firm. The cake must be quite cold so the warm glaze doesn’t melt the buttercream.
  7. Place the cake on a wire rack over a tray and pour over the warm Opera Glaze. Smooth the surface with a palette knife and refrigerate the cake until the glaze has set.
  8. Remove cake from the rack and trim the sides of the cake with a hot knife.

To Serve:

  • ¼ tsp gold powder
  • ½ tsp gin

If you like, cut the cake into rectangular slices approximately 5cm x 10cm. Mix together the gold powder and gin, and using a fine paintbrush, decorate the top of each slice with a triangle of golden glaze. Use a piece of baking paper cut to purpose as a guide to ensure a uniform triangle on each slice of cake.

Alternatively, using chocolate ganache, you could pipe the word “Opera” onto the top of the entire cake and serve whole.

Chicken Asado

Chicken Asado

Chicken Asado

On our recent trip to The Philippines, we spent a week visiting Patrick’s family. As everyone knows, nothing tastes better than your mother’s cooking! We were treated to homemade sinigang, adobo, caldareta and Mommy’s famous Chicken Asado. This recipe is our attempt to replicate the experience of eating your mother’s home cooking, but with modern plating. If you’ve never tried Filipino cuisine, this is a great place to begin. It’s an easy but tasty dish with no challenging ingredients. Let us know if you enjoy it!

This recipe serves 6 people. Serve with rice.

Ingredients:

  • 100ml soy sauce
  • juice of ½ a lemon
  • 6 whole chicken legs (Marylands)
  • 2 medium potatoes
  • 1 large carrot
  • Canola or vegetable oil, for frying
  • 1 medium onion, diced
  • 3 cloves garlic, minced
  • 85g liver spread or chicken paté
  • 300g tomato passata
  • 2 Tbsp brown sugar
  • 1 tsp freshly ground black pepper
  • 1 cup water
  • 2 bay leaves
  • 3 green chillies, whole
  • salt to taste
  • parsley and sorrel leaves, to garnish

Method:

  1. For the marinade, combine soy sauce and lemon juice in a large bowl and add the chicken legs. Rub the marinade all over the chicken, then cover and refrigerate for at least one hour, or overnight.
  2. Cut half of the carrot into matchstick shaped batons approximately 3cm by ½cm. Slice the remaining carrot and the potatoes into ½cm thick slices. Using a 4cm cookie cutter, cut the sliced vegetables into rounds. Then, using a 2.5cm cookie cutter, punch a hole through the middle of the carrot circles, to create a carrot ring and a smaller circle.
  3. In a pan, heat the oil and then shallow fry the potato and carrot until tender and brown. Remove from the pan and set aside.
  4. Remove the chicken from the marinade, reserving the liquid. Fry the chicken in the same pan, browning both sides but not cooking all the way through. Remove and set aside. Once the chicken cools a little, french the bone by cutting through the meat around the bone 1 inch from the base of the leg. Remove the skin and flesh by pulling it from the bone. Clean the bone by scraping away any remaining meat with a knife.
  5. Add the onions and garlic to the pan and sauté until slightly brown, then add the liver spread or paté and continue to sauté until this has browned as well.
  6. Add the tomato passata, brown sugar, pepper, water and marinade. Mix together and add the chicken pieces back to the pan. Simmer over a low heat for 15 minutes, or until the sauce is thick. Add the bay leaves and chillies and continue to simmer for another 5 minutes.
  7. Season with salt and pepper to taste.
  8. Remove the chicken from the sauce and set aside. Strain the sauce through a fine metal sieve into a large bowl, and use a stick blender to emulsify the sauce. Wipe out the pan and return the sauce, then return the pan to a medium heat, reducing the sauce until it thickens enough to coat the back of a spoon.

To Serve:

Swirl 3 tablespoons of sauce in a circular pattern across each plate. Place a chicken leg on one side of the plate, and pour another tablespoon of sauce on top of the chicken. On the opposite side of the plate, arrange the potato and carrot circles and batons according to your preference. Finely chop some of the parsley and use it to garnish the chicken leg. Decorate the plate with some sorrel and parsley leaves. Sarap!

Traditional Asado

If you’re curious to try a more traditional Asado, or just can’t be bothered with fancy plating, simply change a few steps above.

At Step 2, slice all of the potatoes and carrots into 1/2 cm thick slices.

At Step 4, there’s no need to french the bone.

At the end of Step 8, return the chicken, potatoes and carrot to the pan, stir well and serve immediately with rice.